
04.3 / CDS User Guide
Create and manage
material records.
A practical guide to adding, editing, organizing, duplicating, and safely deleting materials.
Complete manuals · download a whole collection
Each collection includes an editable Word manual and its matching searchable PDF, with linked contents, explanatory text, diagrams and references. Theory equations use native Word mathematics. Individual-page PDF buttons remain available.
These are dated reading editions of the public learning content. Interactive studies and account-controlled classroom notes and databases stay online. For current changes, follow the chapter links back to the website.
Current Workbench, reference editions and downloads
Use the online User Guide for current controls, the released model directory for selectable models and compatibility, and the Training Manual for connected exercises. Wider theory references do not mean every formulation is enabled in Workbench.
Dated GUI captures and compiled Web r18 PDF manuals retain their stated scope; they are not a substitute for current hosted Workbench instructions. Find the overview PDF, guides and exercise databases in Your CDS library.
All exercises, case studies and simulation examples → · Your CDS library: overview, manuals and database downloads →
Research and import materials with ChatGPT
In Workbench, choose Material → Find / Import with AI. This is a local review workflow, not an automatic web-search or PDF-extraction service inside CDS.
- Enter the grades or properties you need and copy the research prompt. Paste it into ChatGPT, using manufacturer datasheets or primary publications. Attach private documents there only if you intend to share them with that service.
- Download the JSON template if needed. Bring the structured JSON response back to Workbench through Choose research JSON or paste it and select Load JSON for review.
- Optionally attach up to three local PDF, PNG or JPEG datasheets for comparison. They are not uploaded or automatically extracted. A manual review card is available for direct entry.
- Review material identity, constitutive symmetry, original and converted units, each source document and page/table, and test conditions. Correct or deselect unsupported values. Keep different temperatures, cure states and product forms in separate records.
- Select the properties you verified. Conflicting values require choosing one per property. Unknown values are not converted to zero; estimated values require explicit opt-in.
- Choose an existing material folder or create an import class. Confirm the review acknowledgement, then import new records. Existing materials are never overwritten.
- Expand Imported property evidence in the material source panel to review original values and references. Later edits are marked as changed relative to the import snapshot. Save the workspace as CDS_DB to retain the new records.
Add materials
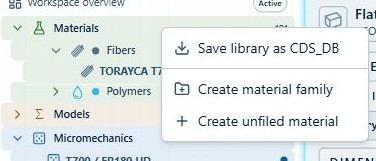
Right-click Materials or an allowed material folder and choose Create. Enter a clear title and select the material class so the record appears in the correct virtual folder.
- Choose Fiber, Polymer, Metal, Elastomer, or Core & Filler.
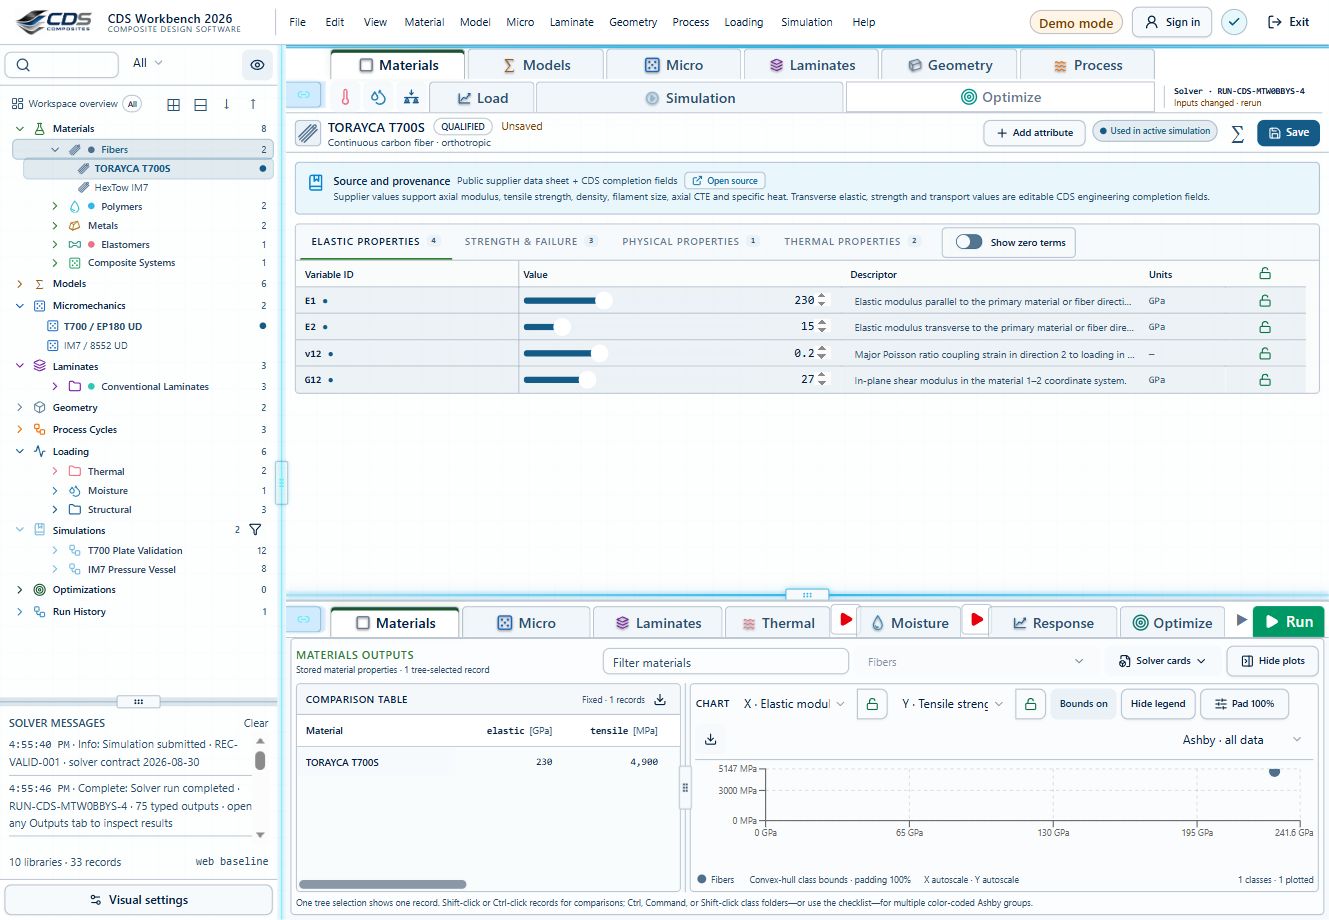
- Enter source and identification details. See screenshot
- Populate the applicable property groups. See screenshot
- Save the new record and verify its folder classification. See screenshot
Edit property values
The material editor uses compact rows for variable ID, descriptor, value, units, and lock state. Hover over truncated descriptors for the full meaning.
- Click the lock to enable editing. See screenshot
- Enter numeric values only in numeric fields. See screenshot
- Confirm units before leaving the row. See screenshot
- Use the value slider for bounded adjustments. See screenshot
- Right-click a value to set lower bound, upper bound, default, and increment jump.
Move and organize materials
Create virtual folders to match suppliers, programs, material families, or qualification status. Moving a material changes its working classification for later selection filters.
- Create a virtual folder under Materials. See screenshot
- Right-click a record and choose Move to folder.
- Confirm the destination.
- Use the material-folder filter to verify the new organization.
Duplicate and delete records
Duplicate is the safest starting point for a related material. Delete removes an eligible user record only after dependency review.
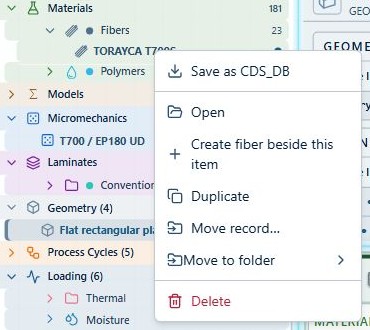
- Right-click the record. See screenshot
- Choose Duplicate and immediately rename the copy. See screenshot
- For deletion, review every downstream lamina, laminate, or simulation dependency shown in the warning.
- Cancel if the record is still required; otherwise confirm deletion.
Use right-click options
Context menus provide the same record actions available through Project Manager: create, duplicate, rename, move, save, export, and delete. Parent-level actions apply to the selected subtree where supported.
- Right-click the exact record or parent folder you intend to affect. See screenshot
- Read the scope shown in the menu. See screenshot
- Use Save Data or local database export when a portable copy is needed. See screenshot
- Check dependency warnings before destructive actions.
Workbench availability: released models, inputs and compatible study paths. The wider theory library includes reference formulations not available in every Workbench solve.