
04.6 / CDS User Guide
Use the interface
deliberately and efficiently.
A practical operating pattern for compact navigation, model checks, result comparison, and portable data.
Complete manuals · download a whole collection
Each collection includes an editable Word manual and its matching searchable PDF, with linked contents, explanatory text, diagrams and references. Theory equations use native Word mathematics. Individual-page PDF buttons remain available.
These are dated reading editions of the public learning content. Interactive studies and account-controlled classroom notes and databases stay online. For current changes, follow the chapter links back to the website.
Current Workbench, reference editions and downloads
Use the online User Guide for current controls, the released model directory for selectable models and compatibility, and the Training Manual for connected exercises. Wider theory references do not mean every formulation is enabled in Workbench.
Dated GUI captures and compiled Web r18 PDF manuals retain their stated scope; they are not a substitute for current hosted Workbench instructions. Find the overview PDF, guides and exercise databases in Your CDS library.
All exercises, case studies and simulation examples → · Your CDS library: overview, manuals and database downloads →
Right-click help throughout the Workbench
Right-click a record, input, workflow block, result plot or workspace area and choose its Help link. Existing edit, export and plotting actions remain in their menus; help opens the relevant manual section in a separate tab.
- Use the help item on the area you are working in: Inputs and Outputs have separate context, and workflow blocks use their own module.
- Press F1 for help on the focused control, or Shift+F10 to open its context menu using the keyboard.
- Use Shift+right-click when you need the browser's native menu, including text editing and link actions.
- Open the Exercise manual for the complete searchable curriculum, then use the user portal Database library to download current exercise copies.
Use Project Manager consistently
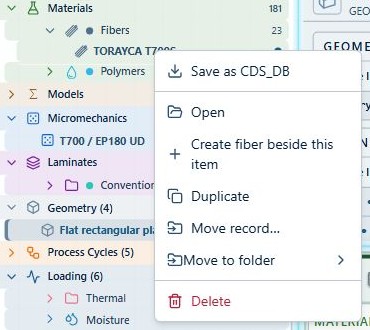
Project Manager mirrors record right-click operations. Use whichever access point is faster, but always verify the selected item and action scope first.
Adjust and retain interface settings
Open Settings: Visual for font size and appearance. Settings: General is available from the top menu and the pop-up settings panel. Preferences are stored on the user’s local system, including optional automatic simulation on opening when the connected model is complete. Choose a density that keeps descriptors readable without hiding the connection summary.
Filter without losing context
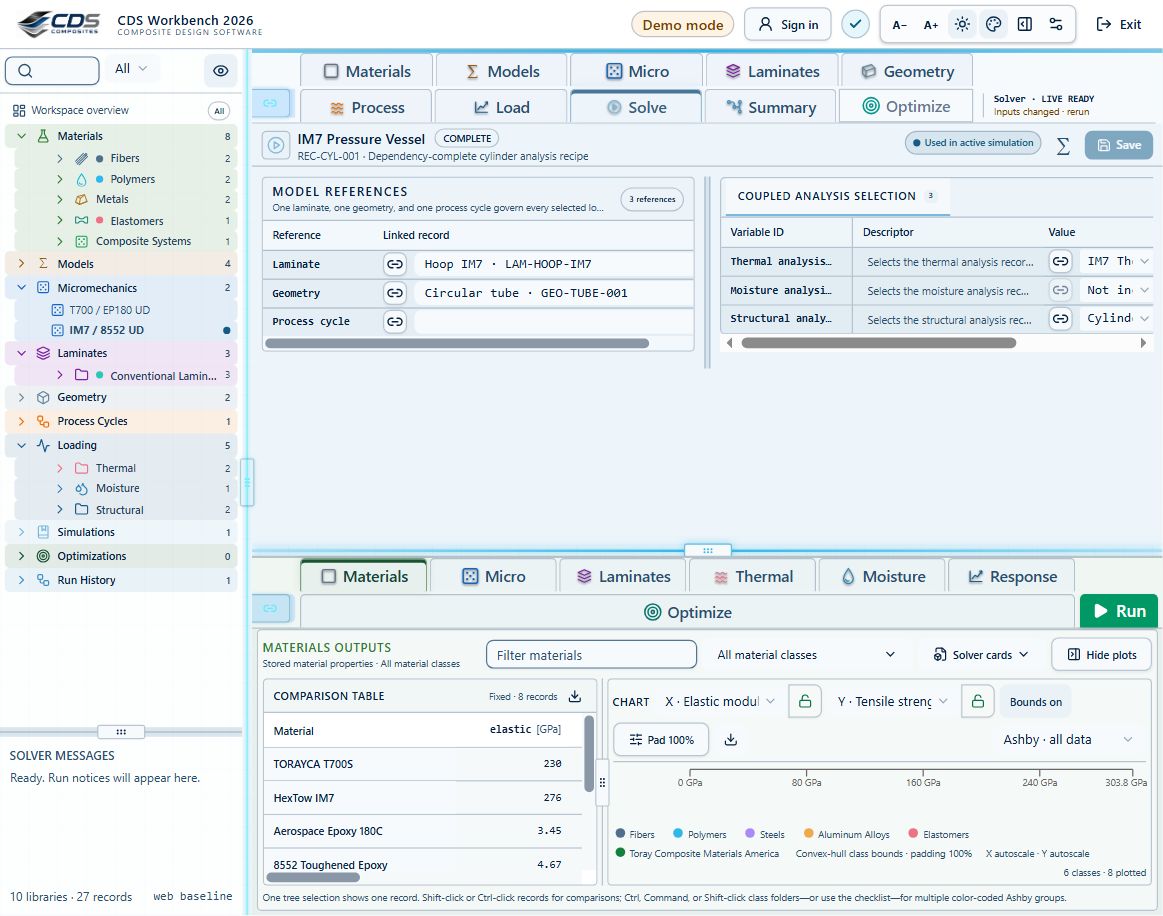
Prefer the compact All records dropdown and virtual-folder filters over collapsing the entire tree manually. Filters retain the menu structure, highlight the active state, and change the heading to Workspace filtered result. Single-click selects; use the chevron or double-click to open child items.
Use locks, bounds, and increments
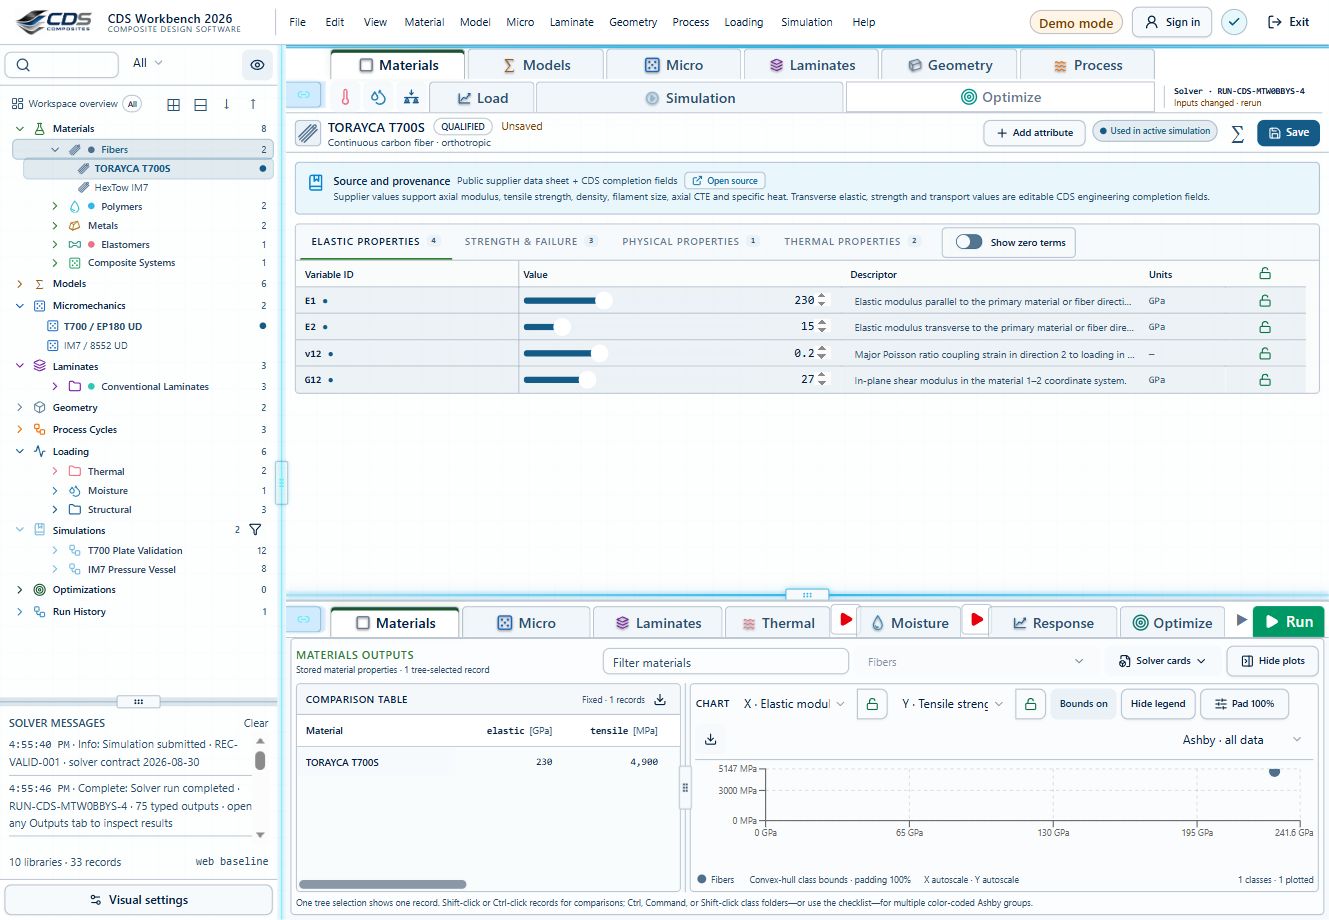
Keep trusted properties locked. Unlock only the values being changed, use physically meaningful bounds, select an increment appropriate to the property scale, and relock after review.
Choose the result view that fits the task
Materials, Micromechanics, Laminates and saved optimizations share Table, Ashby, Bar, and Line views. Use the clearly highlighted active tab for one-record inspection or multi-record comparison. Run leaves that selected tab in place. Wide and tall tables scroll inside the application rather than extending beyond the window.
Control 2D and 3D plots
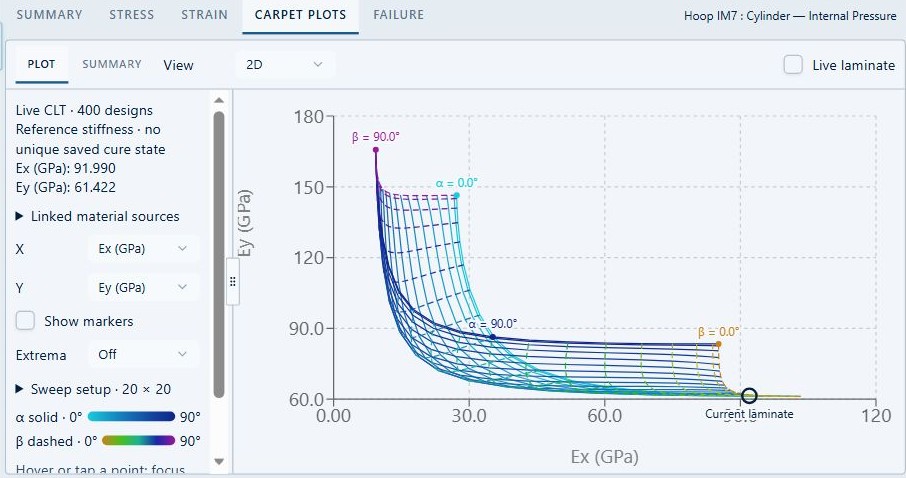
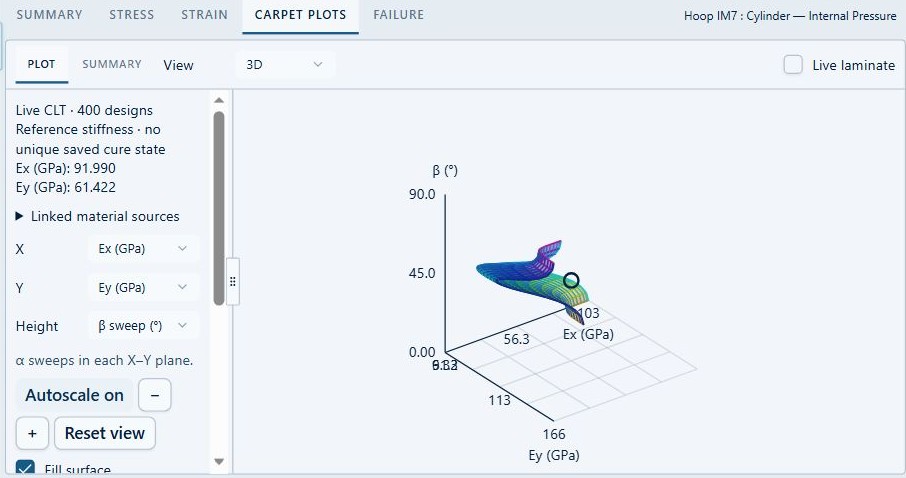
Three-dimensional plots default to a filled surface at 55% opacity. Use Fill, opacity, mesh, extrema and Autoscale on/off to expose the shape without losing the sampled data. Carpet plots place their 2D/3D selector at the top and provide an adjustable divider between controls, plot and live laminate.
Export tabular evidence
Right-click supported tables to save or hand off the visible data in common formats, including CSV and XLSX, with presentation-oriented PPTX export where available. Export uses the current selection, property set and units; confirm those before distribution.
Read the two-layer simulation workflow
The simulation summary separates connected records from their selected models. Use Titles, Details or Table and the zoom controls to fit the overview. Select a block to focus it, then select it again to open its record.
- Show data reveals the key properties passed between modules; hiding it only reduces visual detail.
- Show model workflow reveals the first model layer. Expand Submodels and Scope & theory to inspect formulation choices, calibration and limitations.
- Right-click a model block or the Models browser for that model family's theory. Nested fatigue help opens the separate fatigue assessment.
- Arrow animation is optional. An animated connection does not mean a calculation is running or that its result is current.
Make room without losing your place
Use Lite for a compact workspace and Advanced to expose additional controls. The global switch affects the workspace; local switches expand only their own area. Neither changes model permissions or disables linked physics.
- Use Inputs, Split and Outputs at the top, or the expand icon on either pane, to give editing or results more room. Restore Split to return to the divided layout.
- On narrow windows, toolbar text reduces to icons. Hover for a label, or focus the control with the keyboard.
- Use Back and Forward to revisit input/output scenes. This changes navigation, not your saved data; it is not Undo.
Start with CREATE, DISCOVER or SIMULATE
CREATE guides a starter design; DISCOVER explores the live laminate; SIMULATE opens the normal workspace. Levels in CREATE and DISCOVER introduce more detail without turning teaching defaults into qualified design data.
- In SIMULATE, open Walkthrough highlights and choose an exercise. It opens an independent example with blue step-by-step callouts.
- Move through the steps at your own pace. Run remains a deliberate action and account permissions still apply.
- Stop walkthrough is always available during the guide; Escape also stops it. Exit Discovery returns to the opening page.
Compare designs and review what changed
Expand Compare designs to pin current single-laminate results as A and B. Compare dry weight per area, axial stiffness, available transverse deflection and failure margin.
- Complete a current run before pinning. Open Response → Failure first if you want its assessed margin included.
- Match geometry, loads, units and failure criteria. Not assessed means missing evidence, not zero.
- Expand What changed? to compare inputs against the last successful run. Select a changed input to return to its record; rerun when results are marked outdated.
Know when to press Run
Eligible quick connected calculations refresh after editing pauses. Process histories, mesh and iterative calculations require Run after upstream changes; larger workloads and calculations exceeding the live time budget also switch to Run.
Promote effective results to materials
The Create Material menu in lamina and laminate results converts predicted effective properties into a normal material record. Select a class, name the record, choose whether to preserve source identity, and decide whether unpredicted fields remain empty or receive class assumptions.
Save portable data
Use Save Data or the SQLite database actions for a selected record, subtree, or full database. A laminate export should include its dependent laminas and materials so it can be opened on another instance. Context-menu table exports create separate review artifacts; they do not replace a dependency-complete CDS database checkpoint.
Recommended working sequence
Organize materials, micromechanics, laminates and geometry, then define Thermal, Moisture, Mechanical or EM cases with their own model and applicable cycle. Choose the combination in the SIMULATION block, using None for unused case types. Review the linked inputs and compatibility warnings before Run, then compare current results. Export a portable data checkpoint before substantial restructuring.